Showing posts with label recipe. Show all posts

Thursday, August 23, 2012

Tart-zza Anyone?

We had some friends visit with us and they left us a delightful tart pan (like this).  They also made a spectacular almond peach tart for us, with a cookie-dough like crust, and that got me thinking, when my brain wouldn't shut down as I was trying to get back to sleep this morning at 5 am, maybe I can do something savoury with that?

I've got a short crust recipe that I've used before for a meat pie, and wondered if I could jury-rig something using that to create a sort of tart-pizza crossover.  On top of that, I had to make it wheat free (and I've never really liked the pizza dough recipes without wheat I've tried thus far), no tomato paste, no basil... hmmm.  Well, it worked pretty well!


The crust recipe is:

1 lb of all-purpose flour or whatever you use for flour alternative (I did roughly 1/3 tapioca starch and 2/3 teff flour for this)
1 1/4 cup boiling water
4 tbsp butter
9 tbsp shortening or lard (I used bacon fat)

Boil the water & melt the fats in it, then gradually blend into the flour until it makes a dough.  Work the dough until it's well combined, then press into the tart pan (or two... depending on how big the pan is).  Bake at 375 for about 15-20 minutes until shrunken from the edges somewhat and tart shell is mostly cooked in the middle.


The parsley pesto was made with probably about 2 cups densely packed parsley, finely chopped, 2-3 tbsp of olive oil, romano cheese to taste, and about 2-3 tbsp pine nuts, ground.


Spread  pesto on the baked shell, then layer on the goodies.  I used ham, havarti & a few slices of our garden tomatoes.


Bake at 400F for about 10 minutes, or until the cheese is melted and the tomatoes are a little cooked.  All in all, a great success - we might be able to do pizza night on a regular basis now!

Nose to Tail Spot Prawn Feast

Thanks to our friend Maarten, we were provided with a bag full of spot prawn heads and tails.  The tails were sautéed with butter & garlic and served with a pesto pasta, and the heads were turned into this fabulous soup.


Spot Prawn "Bisque"

approx 1 lb of fresh prawns, head on
olive oil
2-3 cloves garlic, minced
3-5 small shallots, minced
1-2 baby fennel bulbs, fronds removed & diced fine
3-5 small to medium fresh carrots, diced fine
3-5 small to medium tomatoes, chopped fine

  1. Separate the heads from the tails; keep the tails for another dish, or add them at the very end.
  2. Roughly chop the heads (which includes legs and antennae), toss in a little olive oil and place in a rimmed baking pan.
  3. Bake at 300F for about 20 minutes, or until caramelized and roasted smelling
  4. While the prawn heads are baking, sauté the garlic, shallots, fennel & carrots.  Once the vegetables are softened and browned slightly, add the chopped tomatoes and simmer.
  5. Scrape the baked prawns into another saucepan, add boiled water, and use a little of the boiled water to dissolve the prawn bits stuck to the baking tray and scrape all the goodness off into the prawn saucepan.
  6. Bring the prawns in the water to boil, and then reduce to a simmer.  After it's cooked for at least an hour, strain the liquid into the vegetables, and run the prawn heads through a food mill to get the last of the juices out.  Alternatively, you could finely food process the heads, then run through a sieve or a sieve and cheesecloth.
  7. Add the prawn juices to the soup, and reduce to a low simmer, and cook for a number of hours (one at least).
  8. When you're ready to serve, bring back to a boil, and if you like, add the prawn tails to cook for less than 1 minute.  Alternatively, use the tails in another dish.
  9. Serve the soup topped with grated romano or parmesan cheese or just as is.

Thursday, March 8, 2012

Baking for Allergies

Moo Two, II 
Got Milk?  Nope, we don't.

 While avoiding wheat is not a new thing in this household, we've now got the list of allergens or foods to avoid up to quite a challenging tally:
  • dairy (K)
  • eggs (K)
  • wheat (K, B)
  • corn (K)
  • rice (K)
  • soy (B)
  • millet (B)
  • flax (B)
  • chocolate (D)
  • most nuts (A)
(K = Kate, B = Betty, D = Dave, and of course, for now, much of what Kate is off, so am I)

I've found a lot of useful food ideas from the vegan community, since, by default, they don't use any animal products, and that eliminates any possibility of dairy or eggs in their recipes.  There are a lot of people out there going wheat-free, so that helps too.  But when I can't use rice or corn either, that certainly throws up a further challenge.

Here are some useful things that I've learned.

Baking powder usually has corn starch in it, and may even have wheat or gluten hiding in there.  So you can make your own!  All you need is baking soda, some kind of starch (e.g. tapioca, potato, or corn if you want) and cream of tartar.  Easy to do and it stores just fine.

While we've used brown rice flour for yonks (usually at 1/8 cup less per cup of wheat flour called for) instead of wheat flour, we only recently started using sorghum flour, thanks to the recipes from allergyfreemom.com.  I've also played around a lot with flour/starch mixes, and have learned that approximately 70% flour to 30% starch to replace what's called for as wheat flour works pretty well in many applications (I can't remember for sure where I pulled that from, but I know I didn't invent it).  I'm pleased with the  tef grain flour / tapioca or potato starch mix for cookies and muffins; I've yet to try it with cakes, but that'll be next on the list.

What to do about eggs?  Well, for those people who can use soy, that's often an alternative to certain recipes (especially stuff like quiches, I understand).  A half a banana can also replace one egg in a recipe (works for muffins or pancakes, and some more "rustic" cake recipes).  Ground flax meal (best if you grind the seeds fresh yourself) mixed with water (about 1 tbsp meal to 3 tbsp water per egg replaced) apparently gels well and works.  Since flax is one of the things we can't use for everyone here, I thought I'd try chia seed instead.  Same thing: 1 tbsp chia seed (but you don't have to grind it) to 3 tbsp liquid per egg replaced and let it gel.  So far, it's been great in the muffin and cookie recipes I've tried it in.  We've also used the commercially available egg replacer powder; however, I'm enjoying the chia goo more now. Obviously, you can't really replace eggs when it's a true "eggy" dish, like a custard or a sponge cake.

While nothing really replaces butter, I've found that for most of my baking I can get away with olive oil or similar vegetable oil.  Once in a while, though, you need something that will be more or less firm at room temperature, and I've been using palm oil shortening for those situations.  I've not yet tried coconut oil, but since it's usually solid (or at least firm) at room temperature, I think it might work, too.  I did a ginger shortbread recipe using the palm shortening that, ok, wasn't shortbread really, but it tasted fabulous (kind of like the crumble crust on a cheesecake, but with lots of ginger!).

As for milk, it's probably the easiest thing to replace, as long as you can use any one of the milk substitutes, like soy, almond, rice or coconut milk (now also they have barley milk!).  Still haven't figured out how to get around not using full heavy cream, but coconut milk cream does a pretty good job in many situations, and coconut milk is certainly my go-to milk replacement in any creamy-type soup.  And while it's not custard, chia pudding or using gelatin (if you're not vegan) to make puddings with milk substitutes is pretty darned tasty.

Whatever you try, remember, it's probably better than nothing, and sometimes really darned good, but you're never going to get the same results as you would using traditional wheat/dairy/egg in those recipes.  Experiment and see what you come up with - at worst, it's compost, at best, you'll discover a new family favourite!

Friday, February 17, 2012

Chia Pudding - Theme and Variation

Now that I'm at the "what on earth do I feed her" stage of Kate's development, compounded by complications of multiple allergens, I've been scouring the interwebs looking for dairy-, egg- and wheat-free food (preferably baking and desserts, I'm just that kinda gal).

Enter the idea of chia seed pudding: fits in with those of you raw and vegan (if you use a dairy-free option fot the liquid) foodies, fibre-full for those trying to "feel full", great source of calcium and omega-3s, plus endless opportunities to play with flavours.  Now, if you don't like gel-textured things (think: tapioca pudding), run, don't walk, away from this post.  You'll need to come up with some other way to eat your chia seeds.

photos source: blogilates

I started off with blogilates' chia seed pudding: 2 tbsp white chia seed plus 1 cup liquid (in my case, I tried it with rice milk first - this was before we were off rice...).  While it was tasty, it didn't gel at all like in her blog post.  Hmmm.  See how those are dark little bits floating around in the milk?  One of the staff at the Duncan Community Farm Market indicated there wasn't much difference between white and black chia, so I grabbed the least expensive available at the time, which was white.  I went back and picked up black, and it gels way better.

photo source: choosing raw

Next stop: leftover oven-roasted squash with smoked sea salt and rosemary.  That'd be neat, hey?  I used choosing raw's pumpkin chia pudding as a springboard, adding our own home-grown & pressed organic apple juice for the liquid.  Yum, yum.  Very nice use of leftover squash!

Now I have an opened jar of apple juice... let's add a banana, handful of frozen blueberries, and chia seed to the juice, plus a sprinkling of cardamom (a very under-utilized spice in my opinion), combine with stick-blender, and voila!  If you add a few more whole blueberries after the fact, it makes it even more appealing to blueberry-faced toddlers.

photo source: dinutrition

dinutrition decided to riff on this with her own take - I quite like the idea of adding some nut/seed butter to the mix; I will have to try tahini and almond milk next, I think, maybe with some vanilla and a little garam masala?  So many possibilities!

I also recently tried our own cranberry juice (read: extremely tart) with some of our apple juice for sweetness (about 3:1 cranberry to apple juice), some cardamom for spice, and it was really great.  Tangy, interesting, and the chia seemed to soak up the sour.  I wonder what pudding I'll try next...

Wednesday, January 18, 2012

Winter Relief Update


I originally posted a recipe for Whipped Shea Butter over a year ago, and we've been using it quite religiously ever since.  I've made a few changes, though, which I find quite effective.  So here's the updated recipe.

  • 10 oz Shea butter (preferably unrefined, cold pressed or however the equivalent works for it)
  • 4 oz carrier oil (I used grapeseed oil or calendula-infused sunflower oil, if I've got it on hand)
  • 1 oz unrefined beeswax
  • 1 oz unrefined cocoa butter
  • essential oils - I use about 20 drops each French Alp lavender, tea tree and grapefruit seed extract to help with K's eczema, but a nice smelling combination is peru balsam & cinnamon oils.
  • 10 capsules of vitamin E - just the oil inside, I discard the capsules

Prepare your mixing bowl (i.e. if you've got a stand mixer, use that bowl, otherwise get a different bowl to whip the ingredients) by placing in the freezer.  Best not to use a glass or ceramic one, so that it doesn't shatter when you pour the hot liquid into it.

Melt the shea butter, beeswax and cocoa butter in a double burner (I use a ceramic bowl over a pot of almost boiling water, careful that the water doesn't touch the bowl).  Let the temperature of the mixture reach 180F, and keep it there for 20 minutes, stirring occasionally.

Pour the melted mixture into your chilled bowl, add your carrier oil, and place in freezer for about 5-10 minutes, depending on the temperature of your freezer.  Just long enough to start to resolidify the mix, which will make it a little creamy but not solid.

Use stand mixer (if you've got one) or an electric beater to whip the mixture until it forms really thick peaks.  About half way through the process (i.e. it's getting more stiff but still quite creamy and soft), add the essential oils and vitamin E capsule contents, then finish beating.  Scrape the bowl often, because the mixture will solidify at different rates.

When the mixture has reached a nice stiff consistency and holds very strong peaks:


scoop into clean and preferably sterilized containers.  I haven't yet tried, but I bet using a parchment paper icing bag with a big icing nozzle would work really well.  Place the lids on the containers and put away.  Make sure to use up all the extra loveliness stuck to the bowl & mixer parts!

When you go to apply the cream, it will be stiff and hard-ish in the container, but the heat from your hands will melt it really quickly, so as you apply it to your skin, it will soak in beautifully.  Enjoy!

Friday, January 6, 2012

So Much to Tell

We have been very busy in the garden & kitchen during 2011, I just haven't had a chance to share with everyone.  In quick summary:

  • Despite the extremely slow start to the season and depressingly cool summer, we had a surprisingly bountiful harvest from our garden, especially potatoes, dried beans, squash, and tomatoes.  Once again, we figured we would have no tomatillos and ended up with a bumper crop (although they didn't ripen very well, and as a result didn't store very well at all).  Even our peppers did really well this year, and we smoked our Guajillo chillies in our new Bradley Smoker!  They are fabulous in soups, stews and sauces, with just a little bite and a lovely smoky flavour to enhance anything they're tossed into.  We also tried dehydrated tomatoes and had enough of our Red Ruffle bell peppers to dry again this year, which I've been adding to just about all of my savoury recipes.
  • We have our first livestock!  In July, we picked up 9 young Muskovy ducks: 3 drakes and 6 ducks.  They've been enjoying our orchard & field, and keeping the weeds cropped beautifully.  Plus, they really got into slug duty this summer, so we're enthusiastically looking forward to their slugging abilities this coming spring.  They started to lay in late November, and Dave's been collecting about 3-5 eggs every day since then.  We'll be letting them raise their babies in the spring, in the hopes that we can have duck meat to make into confit, casssoulet, ham, sausage, and just duck!
 
  • We participated in a Community Supported Fishery through the Michelle Rose in Cowichan Bay.  As a result, we had about 11 pounds of king shrimp and spot prawns, and a little less than 10 pounds of sockeye and pink filets.  We christened the Bradley by cold-smoking some sockeye, and I made my first batch of gravlax.  The seafood (including the smoked salmon) has made it into a few chowders with our root veggies (rutabaga, potato, parsnip, leeks & onions), smoked guajillo & dehydrated ruffle peppers, home-made chicken stock, our grilled corn nibblets and coconut milk finish - totally yum.
  • We had our first "feast of the fields" equivalent - we hosted a mid-winter feast with our friends, and dined on the gravlax with home-made butter (sigh, not yet with our own cream) on home-grown home-made rye bread, spicy pumpkin soup, espresso-braised venison, rutabaga potato gratin, and pumpkin pie, accompanied with home-made apple plum wine.  It was fabulous, and we're looking forward to repeating this new tradition annually (maybe even semi-annually with a summer feast, too!). 
  • In dealing with eliminating eggs, wheat & dairy (and now corn & rice for the foreseeable future) due to Kate's eczema, I've been exploring baking with allergy-friendly alternatives.  I purchased allergyfreemom.com's recipe book and have made quite a few of her recipes very successfully.  I recommend trying the cinnamon rolls (they're weird to make but really, really tasty) and the gingerbread cookies (even if it's no longer Christmas).  I used sorghum flour in both to great success.     There are also some great recipes on Bob's Red Mill site.  I'm also now trying to eat a lot more veggies, especially greens (check out the TedX presentation by Terry Wahls), and have discovered that I actually love kale chips (go figure)!  I've also invested in some super food stuff via recipes from Meghan Telpner's Making Love in the Kitchen blog.  After enjoying the Tumeric Tea (actually more like spicy chai tea with tumeric added) and Raw Chocolate Bark yesterday, I am definitely looking forward to some more experimentation in this department.

Since I can't seem to keep up with what I'm doing in the kitchen, you can always have a look at my SpringPad site to see what recipes I'm collecting and trying out.

I'm sure there's been more activity - of course there has, Kate's now 18 months and there's been a year's worth full of development and exploration in that department.  The addition is now mostly complete, certainly Mom has been living there since about May, and really enjoying it.  We're now turning our thoughts towards getting Dave a shop built, so that he can get back into making his beautiful furniture.

Monday, October 10, 2011

Sausages in Jars

We've become huge fans of the "meat in jars" concept.  We started this last year when Dave got into making sausages, and we tried a pretty basic venison sausage recipe.  It's great opening a jar of meat and adding it to whatever you've got on the go - much quicker than having to think about taking something out of the freezer to thaw first.

This year, we played around a little with that basic sausage recipe, and came up with three new ones, two of which are in jars, and the last we made into freezer patties.  I'll give you the ingredients here for the mix, but please follow the directions from Hunter Angler Gardiner Cook's venison sausage recipe for the "how to".  Also, if your canning, please follow the pressure canning instructions for ground meat on the USDA's National Center for Home Food Preservation.

Dried Tomato & Fresh Basil Venison Sausage

4 lbs venison
1 lb pork fat
> 1 cup tightly packed fresh basil, chopped
1 head (small, about 8 cloves) garlic, peeled & chopped fine
1 medium onion, chopped
1 cup dehydrated tomatoes, chopped (we used 1/2 cup each of our dehydrated Black Plum and Principe Borghese tomatoes)
1/2 cup dehydrated bell pepper, chopped (we used our Red Ruffle peppers)
1/2 tsp dehydrated jalapeño pepper, chopped (more if you want it spicier)
1 tsp ground smoked sweet paprika
< 1 tbsp sea salt
1/2 cup cold grape juice

After making this into sausage, we canned it.

Curry Ginger Apple Venison Sausage

4 lbs venison
1 lb pork fat
1 tbsp smoked sea salt
1 1/2 tsp curry powder (my own mix)
1 tsp garam masala
1/2 tsp ground ginger
1/2 cup dried tomatoes (Black Plum), chopped
1/2 cup dried bell pepper (Red Ruffle), chopped
1/2 cup dried apple (Gravenstein), chopped
2" fresh ginger root, grated
1 head (medium, about 12 cloves) garlic, peeled & chopped fine
1 medium onion, chopped
1/4 cup honey
1/4 cup cold grape juice

After making this into sausage, we canned it.

Fruit & Maple Breakfast Venison Sausage


4 lbs venison
1 lb pork fat
1 tbsp smoked sea salt
1/2 cup each, chopped: dried cranberries, dried blueberries & dried apples

2 tbsp dehydrated bell pepper, chopped (Red Ruffle)
1/2 tsp dehydrated jalapeño pepper, chopped (more if you want it spicier)
2 tbsp fresh rosemary, chopped
1 tsp ground white peppercorns
1/2 cup cold maple syrup

After making this into sausage, we froze it into patties on wax paper-lined baking sheets, then cut the wax paper around the patties and vacuum sealed them into freezer bags.

Saturday, April 16, 2011

Salmon Puff Muffins

Red Running

Having given up dairy since about October, I have now decided to try eliminating obvious sources of gluten from my diet, to see if that further helps with Kate's rash and eczemic skin. As a result, my lunch options are even further curtailed, sigh. Looking through the pantry this afternoon, I saw some salmon, and I was just not interested in salmon salad without the sandwich (we get fabulous whole grain bread from True Grain in Cowichan Bay, which mills their own flour, but alas, no more for me or Kate for a while). So off to the internet to see what else I could come up with (what on earth did we do before the internet? oh, yes, books... well, I still use those too!), and ran across this post which mentioned a sort of fishloaf muffin with salmon. Hmmm, I could do that! So here's my effort from today:

Salmon Puff Muffins

2 large eggs, separated
2 cans salmon (8 oz tin, or 213 g if you're in Canada)
1/4 cup cornmeal
1 tablespoon dried dill weed (or if you've got fresh, go for it)
1/2 teaspoon curry powder (I make my own, so I reckoned, what the heck!)

Preheat oven to 350F. Whip the egg whites in a separate bowl until stiff peaks form. Beat the egg yolks, then mix in the salmon, cornmeal and seasonings. Use a blender or food processor to mash the salmon mix up into a fairly fine consistency. Gently fold the egg whites into the salmon mix, then dollop into prepared muffin tins (I use the silicone muffin tray and I managed 10 muffins out of this recipe). Bake for about 20-30 minutes or until muffins have risen a bit and are golden brown, starting to crack & separate from the sides, and a tester inserted comes away clean.

I thought this recipe would also be delightful with some smoked salmon added in, or instead use crab meat (although why waste perfectly good crab meat this way?). Season to your taste, and it's very nice served with a little (wheat free!) soy sauce. I bet it would be super good with spicy red pepper jelly too.

As everyone in the household, including Kate, loved these (and I was hard-pressed to save a few for tomorrow's lunch), I guess I'll be buying the full salmon share off the Michelle Rose's community supported fishery, and getting busy canning salmon this year!

Smoked Pork Hock Soup

Soueee!
by burnishings on Flickr.

We discovered a wonderful source for local smoked pork products at the Duncan Farmers' Market in the Square a couple of weeks ago: Ravenstone Farm. We'd been making a delicious pork & beans recipe in the slow cooker, but I wanted something different. I cobbled together a couple of recipes from Art of the Slow Cooker by Andrew Schloss, my "go to" manual for slow cooking and pretty much 80% of our dinners lately! I used a roasted vegetable soup with what I'd been doing for the pork & beans recipe, and got something like this:

Smoked Pork Hock Soup

2 tablespoons olive oil
2 carrots, peeled & chopped into 1" rounds
1 sweet potato (the orange fleshed one!), peeled & chopped into 1" pieces
1 small squash (I've used butternut and Marina di Chioggia), peeled & chopped into 1" pieces
3-4 celery ribs, chopped into 1" pieces
1 large onion, chopped into 1" pieces
4 whole garlic cloves
4 cups total liquid - I used about 2 cups red tomato salsa and 2 cups chicken broth, both home-made
1 medium (about 2 to 3 pounds, depending on the size of your slow cooker - ours is a Crock Pot VersaWare, I think 6 quart) smoked ham hock
1 to 2 cups cooked (or canned) chick peas, drained
1/2 tsp cracked white or green peppercorns
1 cinnamon stick
1 bay leaf

Preheat oven to 425F. Toss the vegetables and garlic in the olive oil and spread over a rimmed baking pan. Roast in the oven for 30 minutes or until softened and slightly browned at edges. Place ham hock in the slow cooker. Scrape vegetables into slow cooker. You can use some of the broth to wash off the pan into the slow cooker if there are bits stuck, but I've not found that necessary. Pour the chick peas into the slow cooker. Add the salsa and broth and stir the ingredients together a little to distribute. Add the peppercorns, cinnamon stick and bay leaf and cover the slow cooker and cook on low for about 10 hours, or high for at least 5 hours, or until the ham is falling off the bone and the vegetables are tender.

This is a very versatile recipe: use whatever root vegetables you've got on hand that you feel like including. It's wonderful with parnsip, turnip (rutabaga), etc. Just enjoy! And like most soups & stews, it's even better the next night. And if you happen to do the baked beans recipe (which I'll have to post at some point) as well, it's fabulous mixed in with this.

Wednesday, November 24, 2010

Winter Relief


We had our first snow of the season (Kate's first snow!) and it's still sticking around as the Arctic outflow is keeping temperatures down. Rather unusual for here in November; that's more like January. So we're all suffering from really dry skin and chapped lips & cheeks this week. So off to the pantry to mix up some winter relief.

Rich Body Lotion

A beautiful thick lotion that feels silky going on and smells even better.

Step one:

Steep about 1 tbsp herbal blend (I use 1 tsp rose petals, 1 tsp comfrey root, and about 2 tsp calendula petals) in:

100 mL boiling water (distilled is recommended)

for at least 15 minutes. Drain into a ceramic dish or glass measure to cool. Once cool, add:

2 tbsp aloe vera juice
2 tsp witch hazel extract

Step 2:

Melt in non-reactive double boiler (I place the oils in a ceramic bowl over a pot of water and simmer):

100 mL carrier oil (I use grapeseed oil)
1/2 tsp grated cocoa butter
2 tsp grated beeswax
2 tbsp shea butter

Once the oils have been melted, get the temperature up to 175 F (I use a candy thermometer), keep stirring & heating for at least 20 minutes to properly and completely melt the shea butter, otherwise it'll crystalize into little bits in your mixture once cooled.

Let the oils cool down once finished, so that they're still at least mushy if not totally liquid, but not still super hot.

Step 3:

Gradually pour your herbal liquid mixture into your oils while using a stick blender to thoroughly beat everything together until creamy. Make sure to do this part gradually and thoroughly so that a proper emulsion forms, otherwise you'll get separation of the oil & water. You may wish to add essential oils at this point; I use about 10-15 drops altogether, but you can use up to 25-30 drops. Suggested essential oils would include lavender, citrus, rose geranium, depending on what you need or what the purpose is for.

Lip Balm

...which also doubles as a great baby bum balm!

Essentially, you want these proportions:

20% beeswax
25% solid at room temperature (e.g. coconut oil or shea butter)
15% brittle at room temperature (e.g. cocoa butter)
40% liquid at room temperature (e.g. pomace olive oil or grapeseed oil, cold pressed for either)

So when I make it, I use:

20 g beeswax
25 g shea butter
15 g cocoa butter
40 g grapeseed oil

plus
1 tbsp total of rose petals & calendula petals
10 drops of essential oil (e.g. lavender, tea tree, rose geranium)

I heat up the grapeseed oil separately in a Pyrex measure in the microwave, then infuse about 1 tbsp altogether of rose petals and calendula petals while the other oils are melting & heating, then strain it. If you're coordinated enough, you could do this a few days in advance so that the herbs have some opportunity to infuse into the oil; if you do, keep the oil in a warm spot, like a sunny windowsill (hah! around here?) or on top of the refrigerator.

As with the lotion, I heat up the beeswax, shea and cocoa butters in a double boiler, heat to 175F and hold for 20 minutes, stirring regularly. Once that's done, I add the strained oil infusion to the hot mixture and bring it back up to 175F, stirring. You can remove from heat, let cool a little, and stir in any essential oils at this point if you wish. I pour it into clean plastic jars that I got for the purpose (a long time ago), but I'm sure Tupperware/Rubbermaid or margarine/cottage cheese/cream cheese containers would be just fine. Let cool, and it'll solidify quite solidly. You have to scrape it a bit with your finger or thumbnail and rub it in your hands to soften it a bit before applying, but it works really well once warmed. If you want it a little less solid, you can always change the proportions by increasing the amount of grapeseed oil in the recipe.

Whipped Shea Butter

This is now my favourite dry skin relief.

10 oz Shea butter (preferably unrefined, cold pressed or however the equivalent works for it)
6 oz carrier oil (I used grapeseed oil)
essential oils

Melt the shea & oil in a double boiler (as before, I use a ceramic bowl set over a pot of boiling water) and bring up to 175F. Keep at that temperature, stirring regularly, for 20 minutes.

Cool over a bowl of ice water, add your essential oils, then whip using a hand mixer or stand mixer, until it reaches "soft peak" stage (like whipping egg whites or whipping cream). I didn't wait that long; mine got just to the equivalent of "trace" when making soap (which means you can dribble some of the mixture over the surface and write with the dribbling). Pour into your clean containers, and it'll set up into a mousse/paté like consistency.

This makes a HUGE batch, so feel free to halve or even quarter the recipe; although with one family member that has psoriasis, one with eczema, and all of us with dry hands, we'll go through it pretty darned fast. The consistency when cool is fabulous, creamy smooth, it melts into the skin instantly and stays moisturized for a long time.

Pickle-y Goodness


Dave & I visited family in Ottawa a couple of years back, and while we were there, we went to the Canada Agriculture Museum. While we were there, one of the demonstrators was canning up pickled carrot sticks. Before I started preserving the harvest, I wasn't that huge of a pickle fanatic; I mean, I like some pickles, but I know that some people like all kinds of pickled things. These pickled carrots were absolutely marvellous. So I knew I had to have the recipe, and lo! they had the recipe right there for us to take away.

Pickled Carrot Sticks

4 lbs carrots, peeled & cut into 4" sticks
6 fresh dill sprigs or 3 tsp dill seed
18 peppercorns
6 cloves garlic, peeled & thickly sliced
3 1/2 cups cider vinegar
2 1/2 cups water
1/3 cup honey

  • Boil water, vinegar & honey
  • Raw pack carrots with 1 clove garlic, 3 peppercorns and one sprig of fresh dill or 1/2 tsp dill seed per scalded pint jar.
  • Pour hot liquid over carrots to 1/4" headspace, and use non-reactive utensil to remove air bubbles.
  • Process for 15 minutes in boil water bath canner (or whatever is appropriate for your altitude).
And of course, if you're pickling, why not do pickled cucumbers?

Dill Slices

4 lbs medium cucumbers
1/3 cup honey
1/2 cup pickling salt
4 cups cider vinegar (see *Note below)
4 cups water
3 tbsp pickling spices in tea ball or spice bag
5 bay leaves
5 garlic cloves, peeled & thickly sliced
5 heads fresh dill or 5 tsp dried dill seed
2 1/2 tsp mustard seed
  • Wash cucumbers, scrubbing lightly with soft vegetable brush to remove spines. Cut 1/8" off blossom end and discard. Cut into 1/4" slices or rounds
  • Combine water, vinegar and salt, and place tea ball or spice bag of spices in, bring to a boil & simmer 15 minutes.
  • Add honey, dissolve, and bring back to boil.
  • Into each scalded pint jar, place 1 bay leaf, 1 garlic clove, 1/2 tsp mustard seed and 1 head of fresh dill or 1 tsp dill seed.
  • Pack cucumber slices into hot jar with 3/4" headspace. Add hot pickling liquid and cover to within 1/2" headspace, and use non-reactive utensil to remove air bubbles.
  • Process in boil water bath canner for 15 minutes (or whatever is appropriate for your altitude).
Note: When I do this recipe, I always get about 1 L of liquid left over from 6 pint jars. As a result, I've got pickling liquid left for another batch.

We have usually an over-abundance of lovely French filet green beans (we grow Maxibel), and while we freeze a lot, we thought it'd be nice to try some kind of pickle recipe. This one is a winner, and is fantastic with dumplings like pot-stickers.

Dilled Green Beans

4 lbs green beans, tipped & snapped into pieces (of course, if you want to have competition worthy beans, then Blue Lake is apparently king, and you want them cut exactly to fit your pint jars. Meh, I say; I just wanna eat them!)
4 cups cider vinegar
4 cups water
1/2 cup pickling salt
1/3 cup honey
3 tbsp pickling spices into tea ball or spice bag
7 cloves garlic, peeled and cut thickly
3 1/2 tsp mustard seeds
3 1/2 tsp hot pepper flakes
7 heads fresh dill heads or 7 tsp dried dill seeds
  • Bring to boil vinegar, water, salt & spices; reduce heat and simmer for 15 minutes.
  • Add honey, dissolve, & bring back to boil.
  • Into scalded pint jars, place one clove garlic, 1/2 tsp mustard seed, 1/2 tsp hot pepper flakes, 1 head fresh dill or 1 tsp dill seed.
  • Pack bean pieces into hot jars.
  • Ladle hot pickling liquid into jars, leaving 1/2" headspace, and use non-reactive utensil to remove air bubbles.
  • Process in boiling water bath canner for 10 mintues (or whatever is appropriate for your altitude).

Saturday, November 13, 2010

Impossible Pie


I had this dessert for the first time at my best friend's house when I was in my early teens, and thought it was just so awesome that I got the recipe from her mum. What makes this impossible is that all the ingredients get piled into a blender or food processor, and the end result has three distinct layers: a crust, a middle, and a topping. Pretty cool, huh?

The original recipe calls for milk, but as I'm on a total dairy elimination diet for my little girl's eczema, we thought we'd try it with coconut milk instead. We're never going back. It was incredible.

We've also done this recipe using a can of pumpkin, and it works really well too. So in the following recipe, replace the coconut milk with actual milk, and just add a can of pumpkin puree, eliminate the coconut, and add some pumpkin pie spicing as desired.

Impossible Pie

4 eggs
1/3 cup oil
1/2 cup flour
2 cups coconut milk (take a 400 mL can of rich, full coconut milk, not skim, and make up the difference with water)
2/3 cup sugar
1 cup grated coconut
2 tsp vanilla extract

Blender the eggs first. Add oil & coconut milk & blend again. Add remaining ingredients and blend until fully mixed. Pour into greased 10" pie plate and bake at 350F for 1 hour (check at 45 minutes if your oven runs hot), or until centre is firm, and top is toasted a golden brown.

UPDATE: While quite tasty hot, it's even better chilled and eaten cold the next day. It might be something like soups and stews, it improves with sitting in the fridge over night. If you can manage to keep your fork out of it until then, I recommend it!

Tuesday, November 9, 2010

Cucumber Relish


We had an overabundance of cucumbers this year (they went a little nuts in our greenhouse), so aside from doing pickled cucumbers (we had a bit of a glut left over from last year as I couldn't bear eating them during pregnancy - I know, go figure!), I had to find something else to do with them. Along came this great cucumber relish recipe, which worked really well for us.

Cucumber Relish

6 lbs (about 10 cups chopped) cucumbers (we used a mix of Cool Breeze, Lemon and Suyo Long)
1 cup chopped white onion
4 cups chopped red bell peppers
3 cups chopped green bell peppers
1 cup chopped celery (about 4 ribs)
1/2 cup pickling or Kosher salt
3 1/2 cups pickling or cider vinegar
1 1/2 cups brown sugar
4 tbsp mustard seed
2 tbsp celery seed
1 tbsp ground cinnamon
1 tsp ground cloves
2 tsp ground allspice
2 tsp ground turmeric

Place all vegetables into an enamel lined or stainless steel pot and stir in salt. Cover & let stand 4 hours at room temperature.
Put vegetables into large colander and drain. Rinse with cold water, using hands to squeeze out excess liquids. Repeat rinse & squeeze.

Combine vinegar & spices & sugar and bring to boil. Cook for 10 minutes. Add drained vegetables and stir to blend. Bring back to full boil, reduce heat & simmer 10 minutes. Fill hot, scalded half-pint or pint jars to 1/2" headspace and process in boiling water bath for 10 minutes (up to 1000 feet altitude).

Monday, November 8, 2010

Nose to Tail... almost

This year we did a much better job of using the lovely venison that Dave got. We've become a little more adventurous, so we saved the heart, liver and tongue, along with the meat and bones this year. With our fabulous pressure canner, we can do meat preservation. Last year was the first year we tried chicken stock, and that was hugely successful. This year, we tried venison chili as well as stock, and they were brilliant.

One of Dave's favourite blogs is Hunter Gardener Angler Cook. Here's his venison stock recipe, which we basically followed (maybe a little less salt, as we didn't add salt to the final product), plus an onion (skin on) and a couple of parsnips, so the result was quite a bit sweeter, likely, than the original.

We made a couple of batches (so far!) of venison chili with our own tomatoes, and while I'd like to use our own kidney beans, the recipe calls for 3 cups worth, and we didn't have enough for two batches as well as saving seed stock for next year. I started with the USDA's Chili Con Carne recipe, then went from there. I can't use chili powder (don't know what's in it that bothers me, but it does), so I added a lot of my own spicing to it. Star anise is just magic with rich meat; I've started adding it to most of my venison recipes.

Venison Chili

  • 3 cups dried pinto or red kidney beans
  • 5-1/2 cups water
  • 3 lbs ground venison
  • 1-1/2 cups chopped onion
  • 1 cup chopped red & green bell peppers
  • 1 tsp black pepper
  • 2 tsp cocoa powder
  • 1 tsp toasted ground cumin seed
  • 1/2 tsp ground coriander
  • 2 tsp ground cinnamon
  • 1 tsp ground cloves
  • 1 tsp paprika
  • 3 to 6 tbsp chili powder
  • 1 1/2 qts tomatoes, peeled & puréed
  • 2 jalapeño peppers, chopped
  • 5 cloves garlic, chopped
Yield: 9 pints

Please read Using Pressure Canners before beginning. If this is your first time canning, it is recommended that you read Principles of Home Canning.

Procedure:Wash beans thoroughly and place them in a 2 qt saucepan. Add cold water to a level of 2 to 3 inches above the beans and soak 12 to 18 hours. Drain and discard water. Combine beans with 5-1/2 cups of fresh water, and 2 teaspoons salt. Bring to a boil. Reduce heat simmer 30 minutes. Drain and discard water. Brown ground beef, chopped onions, and peppers, if desired, in a skillet. Drain off fat and add 3 teaspoons salt, pepper, chili powder, tomatoes, and drained cooked beans. Simmer 5 minutes. Caution: Do not thicken. Fill jars, leaving 1-inch headspace. Adjust lids and process according to the recommendations below.

Recommended process time for Chile Con Carne in a weighted-gauge pressure canner.

Canner Pressure (PSI) at Altitudes of
Style of Pack Jar SizeProcess Time0 - 1,000 ftAbove 1,000 ft
HotPints75 min10 lb15 lb

Dave also got all the accouterments for sausage making this autumn, so we made some batches of venison sausage, too (with lots of meat in the freezer for making plenty more). We started off again at Hunter Gardener Angler Cook with this venison sausage recipe, tried it, then tweaked it for ourselves.

Venison Sausage

4 lb venison meat, ground
1 lb pork back fat, ground
1 tbsp Kosher salt
1 tbsp (heaping) dried juniper berries, chopped
2 tsp crushed dried sage (omit if canning the sausage meat, rather than casing & freezing)
1 tsp black pepper, ground
1/4 tsp (heaping) celery seed, ground
1/2 tsp cumin seed, toasted & ground
1 tsp coriander seed, crushed
1 tsp cinnamon, ground
2 star anise pods, ground
1/2 cup cold grape juice (the original called for gin; this is what we had on hand and it worked just fine)

Follow Hank's instructions for turning into sausages. It's usually suggested that you fry up some of the seasoned meat before you proceed much further, to make sure that you like the flavours you've added before you go to the bother of casing the sausages then find out you don't like it. Not a bad suggestion.

Finally, from one of my favourite cookbooks, Art of the Slow Cooker, comes a marvelous recipe for beef brisket that works just fine with venison cuts, especially big, juicy rump roasts.

Espresso Braised Venison

Rub:
2 tbsp finely ground espresso coffee beans
1 tbsp sugar
1 tsp garlic powder (or 1-2 cloves garlic finely minced)
1/2 tsp ground coriander
1/2 tsp cumin seed, toasted & ground
1/2 tsp coarsely ground black pepper
1/4 tsp Kosher salt

Mix above ingredients in a small bowl & rub all over the meat. Wrap in plastic wrap and let rest at least 1 hour (we usually let it rest in the fridge overnight).

2 tbsp olive oil, divided
3 lbs venison
1 large onion, chopped
1 1/2 cups strong brewed coffee
2 tbsp balsamic vinegar (we used our own fruit vinegar here, yumm)
1/4 cup dark molasses
1 tbsp Worcestershire sauce
2 whole cloves

Heat 1 tbsp oil in large skillet over medium-high heat and brown the venison on both sides (about 5 minutes per side). Transfer to a 5 or 6 quart slow cooker.

Add remaining 1 tbsp oil to skillet, add onion & cook until browned (about 3 minutes). Add remaining ingredients except for the cloves and bring to a boil. Pour over venison in slow cooker and throw the cloves into the liquid. Cover the cooker and cook on high 4 to 6 hours or low 8 to 10 hours until meat is fork tender.

Remove cooked meat from cooker and let rest. Cut across the grain, and serve with the sauce.

Wednesday, November 3, 2010

Halva... Sort Of

I don't have an enormous sweet tooth, but I do love dessert, and I adore halva, a Middle Eastern sweet. We had some fantastic tahini in the cupboard, and some local honey, so I figured what a great use for these ingredients. I've never made it before, so I followed this recipe; I didn't find that it went into the correct texture for halva, I don't know what I did wrong, it's more like fudge. But it tastes great so who cares!!

Tahini Honey Halva

2 cups honey
1 1/2 cups tahini (stir it well if it has separated)
1 cup blanched, roasted & chopped almonds
vanilla or other flavouring to taste

Bring honey to a simmer, stirring to keep from getting hot spots or scorching. Cook until soft ball stage (or 240F/115C). Meanwhile, heat tahini in a separate pot (to 120F/50C), and blanch & roast the almonds (want the almonds hot). Let honey cool a little, then mix in heated almonds, then fold in warmed tahini.

I poured the warm mixture into a very slightly oiled Tupperware container. You can use oiled cake pan, lined with parchment, or oiled ramekins, as long as you can extricate the cooled candy afterward! If you let it cool, then cover to keep air out, leave for 36 hours in the refrigerator to develop the texture of the halva. I wasn't successful with that, but I didn't let it cool enough probably first (it was about 10 pm when I was done cooking it), so I'll try again!

Sunday, June 20, 2010

Basil Sorbet


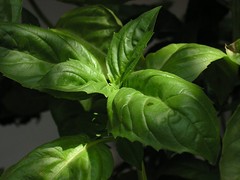
It's been a few years, but we've finally successfully raised basil from seed. Probably not a major feat for most people, but we've never had any luck just spreading the seed and hoping for the best. This year, we used our under-heat propagators and had them started at the same time we started the tomatoes, then put them out into the greenhouse about the same time, and they are doing really, really well.

I wanted to do something different with the basil than just pesto (although I do love pesto), so I searched for a basil sorbet recipe. I found an intriguing sounding one and mostly followed it, with a couple of tweaks of my own.

Basil Lime Sorbet

• 4 cups water**
• 2 cups basil leaves, gently packed
• 1 cup fine sugar (we used organic evaporated cane sugar, and I'd use less next time)
• 1/4 cup fresh lime juice (I used three small fresh limes)

1. Bring water to a boil in small saucepan. Add basil leaves; cook 10 seconds. Drain and reserve cooking water, and immediately plunge basil into cold water. Drain again.

2. Return cooking water to small saucepan, add sugar, and bring back to a boil. Simmer until all sugar is dissolved, creating a simple syrup. Let cool a little, then place in refrigerator to cool completely (2-3 hours at least).

3. Puree lime juice and blanched basil leaves in blender on high speed for about 1 minute, or until you have a smooth, bright-green liquid. If you don't want leafy bits in your sorbet, pour through fine-meshed strainer; I didn't bother. Keep the juice in the refrigerator until ready to combine (see next step).

4. Once cooled, you can return everything to the blender together and reblend to mix the juice, basil & syrup properly. If you blend everything while the syrup is still hot, the basil loses its beautiful bright green; not that it changes the flavour, but it doesn't look as pretty.

5. Freeze in an ice cream maker until slushy-firm (about 25-35 minutes). You may freeze the results into a container separately in the freezer once at this consistency to firm up further, or just eat directly.

This recipe has a wonderful, unusual flavour; the basil is very much present but not overpowering. The lime juice provides a nice acidic hint, and the sugar seems to bring out the flavours of everything beautifully. I think another time that I'd like to try a watermelon sorbet recipe using basil as well... will let you know how that goes when I get around to it.

**EDIT - I highly recommend using 4 cups of raspberry juice (or, if you don't have your own raspberry juice, this might be a little pricey, so you can experiment with water and raspberry juice).

Sunday, June 13, 2010

On Our Own

We ordered some natural food colourings from India Tree and were anxious to give them a try with our own recipes. Mom sort of goes "by guess and by..." with her icing making, so I don't know what recipe she was following, other than using lots of icing sugar, a little butter, a little whipping cream, and I convinced her to use a little lemon juice (given the flavourings of our cake & filling). I can give you the recipes for the cake and filling though:

Lemon Cake

1 cup cream cheese
1 cup softened butter (although when baked, we found this way too much butter for the end result, so I'd suggest half that)
3/4 cup granulated cane sugar
3 eggs
1 1/2 tsp vanilla
2 tbsp lemon juice
1 1/2 cup brown rice flour
1/2 cup sifted whole wheat flour
1 tbsp grated lemon peel (enough from one lemon)

  • Cream butter & cream cheese until smooth.
  • Mix in sugar and beat again until smooth.
  • Add eggs one at a time, beating until incorporated well.
  • Stir in vanilla and lemon juice and lemon peel.
  • Combine flour with baking powder, then stir into batter and beat until well combined.
  • Pour into 2 greased loaf tins, or one 7" diameter round cake tin, or (probably) 12 cupcake cups (fill each 2/3 full).
  • Bake at 350 F for 50-60 minutes (less for cupcakes), or until golden brown and cake tester comes away clean.
Lemon Custard Filling

3/4 cup granulated cane sugar
5-6 tbsp cornstarch
2 cups water
2 eggs, beaten
3 tbsp butter
1/3 cup lemon juice
2 tsp grated lemon rind
  • In microwave-proof glass measure, combine conrstarch and sugar.
  • Gradually add water, stirring until smooth.
  • Microwave on high (100%) 3-5 minutes until mixture thickens, stirring often.
  • In a small separate bowl, beat eggs. Add small amount of hot cornstarch mixture into eggs, mixing, until bring temperature of eggs up.
  • Slowly pour eggs into remaining hot cornstarch mixture, beating rapidly to prevent lumping.
  • Cook custard on medium (50%) in microwave for 2-3 minutes until custard thickens slightly, and coats back of spoon. DO NOT BOIL or custard will curdle.
  • Add lemon juice and rind and butter, stirring until butter melts and rind is incorporated.
  • Let cool, but not set, if using for cake filling.
To use as cake filling, build a dam of icing about 1/4" in from edge of cake, then pour just enough custard within that dam so that it doesn't exceed the height of the dam.


We stuck the tooth pick into the top half and bottom half of the cake before separating the layers so that we could align it properly after the filling was added. Put the top layer of cake onto the filling, then frost the cake. We used the "blue" straight out of the bottle for the base icing; however, there is no true natural "blue" that you can eat, it was more lavender coloured, which was actually very pretty.

We formed roses using the red and yellow dyes, respectively, which made beautiful colours individually.

You can see that the "blue" is quite lavender, and as a result, the "green" isn't! Next time, we'll start with yellow and add just a hint of blue; this time, we were using the icing from the cake which was "blue" to start with.


The consistency of our icing was also far to thin for the roses; I think next time we'll stick with the Wilton "stiff" recipe for proportions, or use royal icing for the roses. The other problem is that the dyes are very liquid (unlike the artificial colouring that we used during the course), so you have to adjust the recipe to include the amount of dye you're going to use (or add more icing sugar). The butter in the icing also melted really fast in our hands in the piping bags, so it's worth chilling it in the bag first, then doing some icing, and maybe chilling in between once in a while.


As you can see, we didn't spend a lot of patience on trying to smooth the icing on our cake first. We did a little, but not a lot. It still tasted good! We used the "green" for the bottom border, and I placed some yellow and pink icing in one piping back without mixing to get the two-toned star border.

The cake was very rich and moist, and the use of a little whole wheat flour with the rice flour worked really well. The lemon custard could be more lemony, so I'd recommend a little more lemon juice and/or rind.

Sunday, November 22, 2009

There's Always Room for Jell-O

OK, not actual store-bought Jell-O, not when you've got a pantry full of beautiful canned fruit juices, straight out of your garden. This is the best fruit gelatin you'll ever have, and I doubt you'll want to go back to that awful chemical stuff once you've tried it.

Fruit Juice Gelatin

Each tablespoon of gelatin should gel 2 cups of liquid. The original recipe from Joy of Cooking calls for a total of 1 cup water (1/4 cup cold, 3/4 cup boiled), and 1 cup of juice. I use all juice, what the heck!

Soak:

1 tablespoon gelatin

in

1/4 cup cold fruit juice

Dissolve it in:

1 3/4 cup boiled fruit juice

You might wish to add up to:

1/2 cup honey

for sweetening, depending on the juice you're using (e.g. unsweetened cranberry juice, you might wish to try 1 cup of Sprite or 7Up or ginger ale to the 1 cup of fruit juice, or perhaps all juice with more honey).

Let set in refrigerator about 4 hours or more. If you want to do this in a jelly mold, make sure to chill and wet the mold before pouring the jelly into it. I've not tried that, but it would be neat!

If you want to add pieces of fruit, wait for the jelly to set mostly (but not entirely) so that the fruit will stay suspended.

You can also replace 1/2 cup of the juice with 1/2 cup of vanilla yogurt for a bit of a different flavour.

Sunday, October 25, 2009

What's Eating You (or rather the other way around...)

Thanks to minouette for this - sounds like fun so here goes:

1) Copy this list into your blog or journal, including these instructions.
2) Bold all the items you’ve eaten.
3) Cross out any items that you would never consider eating.

1. Venison - kind of hard not to when we hunt & eat what we hunt ;)
2. Nettle Tea - does nettle beer count?
3. Huevos rancheros
4. Steak tartare - but am not keen to repeat it; it was a Japanese version.
5. Crocodile/alligator - yup, in Queensland
6. Black pudding - Dave has and loves it. I think I'll avoid it but wouldn't put it in the strikeout list.
7. Cheese fondue - thanks Elizabeth, especially for serving with new fingerling potatoes, yummy!
8. Carp
9. Borscht - having had an unfortunate, life-altering experience with beets at a very young age, I can't even get past the smell to get anything beet-related into my mouth
10. Baba ghanoush
11. Calamari
12. Pho
13. PB&J sandwich - love it but can't eat it any more; no more peanuts for me.
14. Aloo gobi
15. Hot dog from a street cart - is there any other kind?
16. Epoisses
17. Black truffles
18. Fruit wine made from something other than grapes - Practically anything alcoholic we drink in our household is fruit wine we've made not from grapes: apples, pears, blackberries, raspberries, plums, rhubarb (not really a fruit, though), while we don't make it yet, blueberries too.
19. Steamed pork buns - unless you're religion prevents this, how can you not?
20. Pistachio ice cream - allergy
21. Heirloom tomatoes - Um, yeah. See also here and here.
22. Fresh wild berries - Definitely. Leetle teeny tiny ground-covering blueberries in the Cariboo are our current favourites; next to impossible to find, and getting more than a mouthful is a challenge, but so much flavour. Also try this lovely pie filling version for wild huckleberries.
23. Foie gras
24. Rice and beans - staple. With salsa, of course!
25. Brawn, or head cheese
26. Raw Scotch Bonnet pepper
27. Dulce de leche - I hope that gelato form counts?
28. Oysters - thought this one would be a strikeout if you'd asked about a year ago, but I've since been converted, at least to the deep fried variety.
29. Baklava - while everyone in my family adores it, I'm allergic (dratted nut allergy)
30. Bagna cauda
31. Wasabi peas
32. Clam chowder - Manhattan & New England, and all sorts of other seafood chowder combos
33. Salted lassi
34. Sauerkraut - ugh. Cabbage.
35. Root beer float
36. Cognac
37. Clotted cream
38. Vodka jelly
39. Gumbo
40. Oxtail - never again. So sick of ox tail stew from childhood experience. Ugh.
41. Curried goat
42. Whole insects - probably have without knowing it, so won't eliminate it from the running
43. Phaal - not likely; not a huge curry fanatic
44. Goat's milk - not again if I can avoid it
45. Malt whisky from a bottle worth £60/$120 or more - mmmmm
46. Fugu
47. Chicken tikka masala
48. Eel
49. Krispy Kreme original glazed doughnut
50. Sea urchin - not again if I can avoid it.
51. Prickly pear
52. Umeboshi - not again if I can avoid it.
53. Abalone
54. Paneer
55. McDonald’s Big Mac Meal
56. Spaetzle
57. Dirty gin martini - don't like gin & don't like martini's
58. Beer above 8% - "I live in Canada" - ditto
59. Poutine - "I live in Canada" - ditto
60. Carob chips - rather a shock as a kid; don't want to repeat it.
61. S’mores
62. Sweetbreads
63. Kaolin - not on purpose, but it's probably in something I've eaten.
64. Currywurst
65. Durian
66. Frogs’ legs
67. Beignets, churros, elephant ears or funnel cake - "They should add beaver tails to this list" yeah, and whales' tails
68. Haggis - hopefully, I'll never repeat that event. Ugh.
69. Fried plantain - also barbequed / deep fried bananas are great, too.
70. Chitterlings, or andouillette - I think so?
71. Gazpacho
72. Caviar and blini
73. Louche absinthe
74. Gjetost, or brunost
75. Roadkill - Probably wouldn't.
76. Baijiu
77. Hostess Fruit Pie - the things you try as a kid!
78. Snail
79. Lapsang souchong - love it.
80. Bellini
81. Tom yum
82. Eggs Benedict - hate hollandaise.
83. Pocky
84. Tasting menu at a three-Michelin-star restaurant
85. Kobe beef
86. Hare - well, rabbit - does it make a difference?
87. Goulash
88. Flowers
89. Horse - not knowingly, but I did have non-duck "duck" in France, so maybe it was horse?
90. Criollo chocolate - maybe?
91. Spam
92. Soft shell crab
93. Rose harissa
94. Catfish
95. Mole poblano
96. Bagel and lox
97. Lobster Thermidor - don't like lobster
98. Polenta
99. Jamaican Blue Mountain coffee
100. Snake

Tuesday, August 25, 2009

Baby Green Fig Preserve


A Fig Tree by Melita on Flickr

We had a wonderful harvest of our green figs this year; however, every year, we seem to have a second crop which absolutely never matures. It seems a shame to let them just drop off and rot, so I tried to find something to do with them. I'll tell you, it was a challenge. While I did find a couple of recipes (or thought I did), none of them provided me with actual, specific processing instructions, and that's a problem for figs (here are instructions for canning fresh, ripe figs - you'll notice how long the boiling water bath processing takes with them).

Figs are not a highly acidic fruit, so you either have to acidify what you're preparing them for, or you have to pressure can them (I got reference for the pressure processing from a couple of different sources, including Stocking Up, to use 5 lbs pressure for 10 minutes, but my pressure canning manual that came with my weighted-gauge pressure canner doesn't recommend anything done at less than 10 lbs pressure). That's fine, but I didn't really have a positive idea of how long & at what pressure to process in the pressure canner. And how much lemon juice or vinegar do you need to add to acidify them sufficiently to just use the boiling water bath method? And really, who wants to process for 45-50 minutes in the boiling water when a pressure canner cuts the time enormously?

Not really knowing what to do, I sort of combined knowledge from a few different locations. My base recipe was from a post by "denninmi" on a garden forum. But I added a signifcant amount of vinegar (roughly based on this pickled green tomatoes recipe) to hopefully increase the acidity sufficiently.

Sikalaki Gliko

2 pounds unripe figs
3 pounds sugar
2 cups cider vinegar
1 cup water
1 lemon, seeded & diced fine
1/2 tsp cloves
1 tsp cinnamon

Rinse the figs and poke a hole in blossom end of each fig with a thick nail, a screwdriver or just a paring knife. This step is very messy from the sticky latex oozing out of the figs. I also pruned off the stems, but other recipes suggest to leave the stems intact (I suspect this is for ripe figs only, but I'm not sure).
Place figs in water and let them soak for a few hours (I basically let them soak overnight). Discard the soaking water.
Boil the figs in plain water for 15 minutes.
Transfer figs into cold water, allow to cool down, then drain.
Replace cooking water with fresh water, and repeat the sequence of boiling the figs for 15 minutes, putting them in cold water until they’re cool, and then draining them.

I used a less than perfect aluminum pot (stainless steel is always recommend for preserving foods as it's non-reactive), because I didn't want to have an uncleanable, boiled-on latex mess on my wonderful stainless steel maslin pan. Yes, the boiled latex came off with a significant amount of elbow grease and a scrubby pad.

Boil the 3 pounds of sugar with the vinegar and water for about 5 minutes, then add the figs, diced lemon and spices.
Boil the figs in the syrup for 30 minutes, then turn the heat off.
Leave the figs in the syrup for 12 hours.
Remove the figs from the syrup and boil the syrup until "thick" - I boiled the syrup to soft-ball stage (230F). This took a good hour of stirring and waiting.
Put the figs back in and bring back up to a boil so that the figs are hot and the syrup is boiling. I did this part in my maslin pan, which was perfectly shaped for this step, and by this point the latex had been boiled out of the figs.


Transfer the figs to clean, scalded half pint (250 mL) jars. Squish the figs down so that the air is pushed out of the centres, and to pack the jar well. Don't pack the figs too tight; I did that and had to reprocess 5 of my 7 jars! And as a result of reprocessing, I had to make up a quick & dirty vinegar syrup to bring up the volume. Pour a little syrup to bring headspace up to 1/2" from rim. Run non-metal spatula around inside edge of jar to let air out, and adjust the headspace as necessary. Wipe rims with hot damp paper towel and apply two-piece metal snap & screw lids.

Now here's the tricky part. I couldn't find any concrete information about the processing time, so I placed the jars in my weighted gauge pressure canner and processed at 10 lbs pressure for 10 minutes (remember that you have to vent the canner according to the manufacturer's instructions before you place the weighted gauge on the vent, and timing for processing starts once the gauge starts to jiggle, indicating that the 10 lbs pressure has been reached).

I have to say that boiling the green figs is horribly stinky. I didn't enjoy that at all (about as pleasant-smelling, in my opinion, as boiling stinging nettle for nettle beer; in fact, I thought the boiling figs was far worse than the stinging nettles, and that's saying something). But once you get the figs into the syrup and start to flavour them with sweet & spice, it seems much less unpleasant. I tried one of the figs today and while it's not sweet, exactly (the syrup is), and it doesn't taste like a fresh ripe fig, you can certainly get an essence of fig-ness from the flavour, as well as green-ness. It'll be really interesting to try it with stinky cheese and crackers; that's what I'd originally wanted to do this for. So, fingers crossed it was worth doing!!

And fingers crossed that I don't kill us all with botulism from under-processing the figs. But with the vinegar, and the increase pressure, I think (hope!) I've over-compensated.