Sunday, June 20, 2010

Basil Sorbet


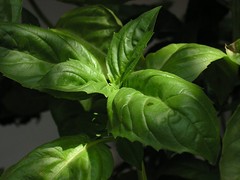
It's been a few years, but we've finally successfully raised basil from seed. Probably not a major feat for most people, but we've never had any luck just spreading the seed and hoping for the best. This year, we used our under-heat propagators and had them started at the same time we started the tomatoes, then put them out into the greenhouse about the same time, and they are doing really, really well.

I wanted to do something different with the basil than just pesto (although I do love pesto), so I searched for a basil sorbet recipe. I found an intriguing sounding one and mostly followed it, with a couple of tweaks of my own.

Basil Lime Sorbet

• 4 cups water**
• 2 cups basil leaves, gently packed
• 1 cup fine sugar (we used organic evaporated cane sugar, and I'd use less next time)
• 1/4 cup fresh lime juice (I used three small fresh limes)

1. Bring water to a boil in small saucepan. Add basil leaves; cook 10 seconds. Drain and reserve cooking water, and immediately plunge basil into cold water. Drain again.

2. Return cooking water to small saucepan, add sugar, and bring back to a boil. Simmer until all sugar is dissolved, creating a simple syrup. Let cool a little, then place in refrigerator to cool completely (2-3 hours at least).

3. Puree lime juice and blanched basil leaves in blender on high speed for about 1 minute, or until you have a smooth, bright-green liquid. If you don't want leafy bits in your sorbet, pour through fine-meshed strainer; I didn't bother. Keep the juice in the refrigerator until ready to combine (see next step).

4. Once cooled, you can return everything to the blender together and reblend to mix the juice, basil & syrup properly. If you blend everything while the syrup is still hot, the basil loses its beautiful bright green; not that it changes the flavour, but it doesn't look as pretty.

5. Freeze in an ice cream maker until slushy-firm (about 25-35 minutes). You may freeze the results into a container separately in the freezer once at this consistency to firm up further, or just eat directly.

This recipe has a wonderful, unusual flavour; the basil is very much present but not overpowering. The lime juice provides a nice acidic hint, and the sugar seems to bring out the flavours of everything beautifully. I think another time that I'd like to try a watermelon sorbet recipe using basil as well... will let you know how that goes when I get around to it.

**EDIT - I highly recommend using 4 cups of raspberry juice (or, if you don't have your own raspberry juice, this might be a little pricey, so you can experiment with water and raspberry juice).

Thursday, June 17, 2010

Change Table / Dresser

Dave has been working on a changing table / dresser for the nursery, and it's almost finished. He has to do a little sanding before painting it, but the top is a piece of Corian, so he's got a bit of sanding to polish that up to the right finish, too.

We picked up the hardware from Lee Valley, and it looks very nice on.


We've picked a colour to go with the purplish Corian, which will make repainting the nursery (when we get there) a bit of a challenge, but we'll figure something out.

Naturally, the piece is full of little details that just make it so beautiful, and of course, beautifully crafted:

So exciting!!

Wednesday, June 16, 2010

Blue Fungus

Dave discovered a collection of fascinating-looking, intense cyan blue fungus yesterday, and kindly brought the branch to the awkward pregnant lady so I didn't have to go wandering through the brush to see it. The fruiting bodies ranged from about 3mm to 7mm in width.

Apparently it's Chlorociboria aeruginascens, which is not uncommon and found around North America and Europe; however, it is apparently unusual to see the fruiting bodies. Often, you'll just see the blue-green stain on the wood, usually a hardwood (apparently commonly on oak). We figure this is an alder branch, as Dave found it amongst the alder stand.

Here are some links to further information about this species:

Wikipedia - Chlorociboria aeruginascens
Mushroom Expert - Chlorociboria aeruginascens
Rogers Mushrooms - Chlorociboria aeruginascens
WiseAcre Gardens - Blue Stain Fungus

Thanks, Dave, for another great fungus find!!

Tuesday, June 15, 2010

Happy Tomatoes

Things are progressing very well in the greenhouse.

Earlier this week, we replaced the wooden stakes that the tomatoes were supported by with lines strung between eyehooks in the rafters and the raised bed sills. Dave ran across this idea from The Cottage Smallholder last May, and we both thought it would be a good thing to try. Last year, though, with the half wine barrels, it wasn't quite practical. This year, with the raised beds, everything lined up really well for this project. We use the Velcro ties from Lee Valley to support the tomatoes from the lines, and they're fantastic - reusable, super easy to implement, and very soft & delicate against the tomato stalks.

As you can see, everyone is really thriving - here are some images to compare to early May when we'd just transplanted all of these guys:

Plus the middle bed now has plants in it: watermelons and cucumbers, and basil in between.

We have our first tomato flowers, many even on the bigger tomatoes (not just the cherries):

Our eggplants and peppers are doing really well; both varieties of each have really caught up. The initial transplants had the Dusky eggplants and Red Ruffle peppers ahead of the Listada de Gandia eggplants and jalapeño peppers, respectively. Everyone is looking fantastic now, and all our pepper plants are putting on little tiny flowers, which should be ready within the next few weeks for pollinating.

The eggplants all look alike, but the growth pattern of the peppers are interestingly quite different; the Red Ruffle is the one on the left, the jalapeño on the right.

So, fingers crossed that our "bumbling" hand pollinating will work again this year as well as they did last year.

Sunday, June 13, 2010

Wee Visitor

Last week, we had a little visitor roosting above our porch in the evenings:

Now that the weather is better, he's not been coming around, but we noticed the bird poop first, as our bag of clothes pegs is right under his roost, and the poop was collecting. One evening, as I shut the screen door, I turned the outside light on and looked outside, and discovered the poop culprit: a wee chestnut-backed chickadee. Awww!!!

Birthday Cupcake

My uncle's birthday is this coming Tuesday, and we had some leftover icing, so Mom made a lovely little cupcake for his birthday cake:


This is way too much fun!

Fondant Animals

We took another workshop through Pat Spezowka at At the Sea B&B in Mill Bay, this time it was four hours this Saturday, introducing us to modelling fondant animals.

We started with a 1:1 mixture of fondant and gum paste, which you have to work quite well to warm up and make pliable. Once it's been worked, you must keep it out of the air, so we spent a lot of time shaping then sticking things in ziploc bags.

Our first project was a blue bird:


This gave us the opportunity to learn colouring and simple modelling techniques for the fondant. Next was a sheep, which has a fondant body that was then covered in royal icing piping for the wool (and fondant legs & head):

Finally, we did fondant dogs:


It was a great workshop, once again; we learned a lot, had a lot of fun, and are inspired to play with this some more in the future.

On Our Own

We ordered some natural food colourings from India Tree and were anxious to give them a try with our own recipes. Mom sort of goes "by guess and by..." with her icing making, so I don't know what recipe she was following, other than using lots of icing sugar, a little butter, a little whipping cream, and I convinced her to use a little lemon juice (given the flavourings of our cake & filling). I can give you the recipes for the cake and filling though:

Lemon Cake

1 cup cream cheese
1 cup softened butter (although when baked, we found this way too much butter for the end result, so I'd suggest half that)
3/4 cup granulated cane sugar
3 eggs
1 1/2 tsp vanilla
2 tbsp lemon juice
1 1/2 cup brown rice flour
1/2 cup sifted whole wheat flour
1 tbsp grated lemon peel (enough from one lemon)

  • Cream butter & cream cheese until smooth.
  • Mix in sugar and beat again until smooth.
  • Add eggs one at a time, beating until incorporated well.
  • Stir in vanilla and lemon juice and lemon peel.
  • Combine flour with baking powder, then stir into batter and beat until well combined.
  • Pour into 2 greased loaf tins, or one 7" diameter round cake tin, or (probably) 12 cupcake cups (fill each 2/3 full).
  • Bake at 350 F for 50-60 minutes (less for cupcakes), or until golden brown and cake tester comes away clean.
Lemon Custard Filling

3/4 cup granulated cane sugar
5-6 tbsp cornstarch
2 cups water
2 eggs, beaten
3 tbsp butter
1/3 cup lemon juice
2 tsp grated lemon rind
  • In microwave-proof glass measure, combine conrstarch and sugar.
  • Gradually add water, stirring until smooth.
  • Microwave on high (100%) 3-5 minutes until mixture thickens, stirring often.
  • In a small separate bowl, beat eggs. Add small amount of hot cornstarch mixture into eggs, mixing, until bring temperature of eggs up.
  • Slowly pour eggs into remaining hot cornstarch mixture, beating rapidly to prevent lumping.
  • Cook custard on medium (50%) in microwave for 2-3 minutes until custard thickens slightly, and coats back of spoon. DO NOT BOIL or custard will curdle.
  • Add lemon juice and rind and butter, stirring until butter melts and rind is incorporated.
  • Let cool, but not set, if using for cake filling.
To use as cake filling, build a dam of icing about 1/4" in from edge of cake, then pour just enough custard within that dam so that it doesn't exceed the height of the dam.


We stuck the tooth pick into the top half and bottom half of the cake before separating the layers so that we could align it properly after the filling was added. Put the top layer of cake onto the filling, then frost the cake. We used the "blue" straight out of the bottle for the base icing; however, there is no true natural "blue" that you can eat, it was more lavender coloured, which was actually very pretty.

We formed roses using the red and yellow dyes, respectively, which made beautiful colours individually.

You can see that the "blue" is quite lavender, and as a result, the "green" isn't! Next time, we'll start with yellow and add just a hint of blue; this time, we were using the icing from the cake which was "blue" to start with.


The consistency of our icing was also far to thin for the roses; I think next time we'll stick with the Wilton "stiff" recipe for proportions, or use royal icing for the roses. The other problem is that the dyes are very liquid (unlike the artificial colouring that we used during the course), so you have to adjust the recipe to include the amount of dye you're going to use (or add more icing sugar). The butter in the icing also melted really fast in our hands in the piping bags, so it's worth chilling it in the bag first, then doing some icing, and maybe chilling in between once in a while.


As you can see, we didn't spend a lot of patience on trying to smooth the icing on our cake first. We did a little, but not a lot. It still tasted good! We used the "green" for the bottom border, and I placed some yellow and pink icing in one piping back without mixing to get the two-toned star border.

The cake was very rich and moist, and the use of a little whole wheat flour with the rice flour worked really well. The lemon custard could be more lemony, so I'd recommend a little more lemon juice and/or rind.