Last night we started getting a dump of snow, but then it changed to rain and started to melt. So I reckoned we'd be free & clear of the white stuff in the morning. Not so much! This was the view from our front doorstep at about 11 am this morning.
So on such a crappy weather day, I thought it'd be nice to bring some sunshine into our house in the form of lemon muffins. There's nothing like having a bit of lemon zest zing to clear the drab dull winter blahs, and lavender to revitalize the ugliest of morning grumpies.
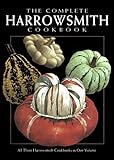
Lemon Muffins (originally from The Complete Harrowsmith Cookbook: All Three Harrowsmith Cookbooks in One Volume
, but adapted, of course!)
2 cups flour (you can use 1 cup unbleached and 1 cup whole wheat, for a nice hearty texture)
1/2 cup honey
1 tbsp baking powder
1/4 cup oil
1/4 cup plain yogurt
1/2 cup fresh lemon juice (2-3 lemons)
zested rind of those lemons
1/4 tsp cardamom
1 tsp lavender florets finely chopped
2 eggs
Combine dry ingredients. Combine moist ingredients. Stir moist into dry until just incorporated. Spoon into greased muffin tin about 2/3 full, and bake at 400° F for 15 minutes. Makes 12 muffins.
Dave just finished the lighting last night in the kitchen, so we've got track, ambient and also light over the stove top because of the range hood (installed about a month ago). Hmmm, with this much light, I can really see what needs cleaning! Sigh.
Sunday, January 27, 2008
Snowy Sunday
Friday, January 25, 2008
All in the Family
 Last year, Dad raised three pigs, which were very cute, but got big pretty fast. They were destined for the freezer from the get-go, but I think Dad had some difficulty when it came time for them to meet their destiny.
Mom did a lovely little painting of the three pigs, and Dad decided that he must have it. So she sold it to him, and asked Dave to build a frame for it. We just put the piece together today, and it looks beautiful. The frame is fir that's been dyed a little, but really, the colour is from multiple layers of finish. It's hard to see in the photo, but the grain still shows up, just more subtle than in the raw wood. It's also not that black, more of a deep espresso colour, which really complements the painting.
So thanks to Dad for the growing, Mom for the painting, and Dave for the framing, of Dot, Rose & Penny!
Sunday, January 20, 2008
Trip to Horsefly
I forgot to post about our recent trip to visit the Hillaby Ranch up in Horsefly.
View Larger Map
We took the Greyhound up to save stress on driving; it's a long bus ride though, because it takes so long just to get out of the Fraser Valley. It stops at a bunch of places before it hits Hope. Past that, it's not too bad, but the scenery was somewhat obscured by the schmutz on the windows from the salt etc. off the highway.
We had a great visit; Dave & I went snow shoeing and cross country skiing across the pond & fields a couple of the days we were there. Had a lovely dinner with the Kaeppels, friends of Dad & Judy. We also wasted a ton of time playing on Dad's Nintendo DS system (puzzles & Simpsons), and decided that we definitely need one for the ferry crossings to & from the Island. One day! We also read through the last Harry Potter; great book! Judy built a great roaring bonfire out in the horse paddock on our last day & we roasted some smokies for dinner. It was a great fire, but tricky to negotiate to in the knee-deep snow in the dark (yeah, a flashlight might have helped...).
 Pretty lacy seed head
 Winter wonderland - out on the frozen pond
 Amie X-country skiing - I like flat bits!
 Dave 'n' Sadie
 Action shot!
 'nother action shot!
 Cold Muscovy ducks - Maggie & Lavender
Saturday, January 19, 2008
Mmmm, honey...
 Honey bee on one of our bachelor's buttons
If you have a sweet tooth, nothing compares to honey to fix your craving. I'm rather partial to dark, heavily flavoured honeys myself, such as buckwheat and maple, but I also like the light ones like apple or clover. When I was in Australia, I was lucky to sample some of their native honeys like jarrah and eucalyptus, and wow, were they fantastic. Too bad I can't get them here in Canada!
So for a honey soaked treat, try these traditional Roman (the culture, not us!) cheesecakes. The rough conversions, based on my couple of trials, are in brackets.
Roman Cheesecake
120g (1 cup) flour
224 g (1 cup, approx half a 500 g container) ricotta or cottage cheese
1 egg, beaten
4 bay leaves
120 g (1/2 cup) honey, heated
Beat ricotta until soft. Mix in beaten egg. Stir into flour. Form soft dough & divide into 4 parts. Place onto bay leaves laid out onto greased baking sheet. If you've got a toaster oven, this is a perfect use for that little baking sheet that comes with it, and it bakes these at a much more efficient rate than in a huge conventional oven. Bake at 425°F for 35-40 minutes until golden brown (with the toaster oven, you might want to take them out & flip them over towards the end to brown the undersides a tad if it didn't do so originally). Warm the honey and place cakes into warmed honey until absorbed fully.
These Roman cheesecakes are similar to another one of our favourites, but a sweet version. Here's the a more savoury option for a dinner-accompaniment
Swiss Cheese Gougère (original in The Complete Harrowsmith Cookbook: All Three Harrowsmith Cookbooks in One Volume
2/3 cup water
1/4 cup butter
3/4 cup flour
2 eggs
1/2 cup shredded Swiss cheese (although I suspect this would be brilliant with any flavourful semi-hard cheese, e.g. jalapeno Jack, Monterey, sharp cheddar)
2 Tbsp Dijon mustard
 Boil water and butter in heavy saucepan. Add flour all at once and stir with wooden spoon until mixture forms a ball. Remove pan from heat and add one egg, beat until fully incorporated. Add second egg & beat until well blended. Stir in cheese & mustard. Form 5 balls and place into greased pie plate. Bake at 475°F oven for 20 minutes, reduce to 375°F and bake 10 minutes further until pale & golden. Recipe doubles nicely.
Thursday, January 17, 2008
Let There Be Light!
We spent the last two days wandering helplessly through aisles and aisles of lighting fixtures, blinding ourselves every few minutes as we look up into a glaring bulb placed just so. We say to each other "I Nina'd myself" because our sister-in-law, Nina, is working towards completing her interior design diploma, and during the lighting class she kept giving herself welders' flash headaches by looking into the light. Don't do it. But it's really hard to avoid!
We had already been to Robinson Lighting, then we went to Norburn Lighting. Both are kind of pricey, plus anywhere you go where "trades" go, you can never find what the price is unless you ask, because it's differentially priced depending on who you are. Ugh. We had tried Home Depot in Coquitlam and weren't impressed; then we tried the one near Scott Road SkyTrain and they had a much better selection & display of lighting. Someone there said that the North Vancouver one was even better, more upscale. So much for shopping at a chain! Finally, we wandered around IKEA.
The end result is this fixture for our dining room from Home Depot: I am rather partial to it because while it's quite simple, it still has lots of sparkle thanks to the fluted/scalloped glass bulb "shades" (I don't know what you call them), and it's bright because it uses eight xenon bulbs.
For the kitchen, we've decided to go with track lighting, and have purchased these lights for the same kind of light fixture, but not in a three-head version, just singles, but you get the idea.
We also ordered a bath tub (YAY!) from Home Depot, which will hopefully be here within the next 3-4 weeks. We are kind of stuck in the bathroom for proceeding without it, so that's why Dave is now dealing with lighting. The next project is installing the track in the kitchen. Oooo! Light in the kitchen. I can hardly wait!! We currently have a couple of fluorescents behind a heavy oak frame (well, actually, we don't currently have that - Dave took that down yesterday). And fluorescents are a pig to work under; anywhere you stand in the kitchen, you're blocking the light to what you're working on. Blech. So I'm looking forward to the new tracks. Dave installed an exhaust fan above the stove a couple of weeks ago, and the two little halogen lights in that do a better job of lighting the kitchen than the dratted fluorescents. Of course, it doesn't help that one of the ballasts has decided to act up, so we had one working and one flickering set of fluorescents for the past month or so. Highly annoying.
We spent some more time at Olympia Tile and drooled over their stock. I brought home a few samples for the backsplash & tub surround & floor. I think we've decided on a matte glass tile for the backsplash & tub surround, but aren't quite decided for the floor. It's fun browsing colours and textures in tiles, and Olympia is a great store with really nice displays that they change fairly regularly.
Crunchy Banana Breakfast Muffins

I can't resist hot muffins for breakfast, so while I don't do it every day, I like to bake them fairly often. We have some bananas and I thought that'd be a good muffin base, so I checked my trusty Harrowsmith Cookbook
Crunchy Banana Muffins
1/2 cup unbleached flour
1/2 cup whole wheat flour
2 1/2 tsp baking powder
1/4 tsp baking soda
3/4 cup rolled oats
1 egg, beaten
2 mashed bananas (approximately 3/4 to 1 cup)
1/2 cup milk
1/3 cup chopped sunflower seeds
Combine dry ingredients. Combine moist ingredients. Add moist to dry and mix until just moistened, and stir in sunflower seeds. Spoon batter into well-greased muffin tin to two-thirds full. Bake at 400°F for 18-20 minutes.
Sunday, January 6, 2008
Penuche me, baby!
Having been cursed with a sweet tooth, but insisting that any dessert I might want, generally I have to make, I baked us a cake last night. The cake was my aunt Mary's Gingerbread cake, which is a ridiculously easy, few-ingredient requiring, very moist cake. Not quite satisfied with just cake, I also made penuche icing. Penuche is a fudge (actually, I just discovered a link to penuche fudge candy and no-bake penuche drop cookies; might have to try those - without the nuts for me). This is a fudge icing, and unfortunately, is very easy to do.
Gingerbread
(the cake, that is, not the house or cookies!)
1 1/2 cup flour
1 tsp ginger
1 tsp cinnamon
1/4 tsp cloves
1/3 cup olive oil
1/2 cup brown sugar
1 egg, beaten
1/2 cup molasses
3/4 cup boiled water
1 tsp baking soda
Grease an 8"x8" baking pan & line with wax paper cut to the shape of the bottom of the pan. Preheat oven to 350°F.
Combine flour & spices. In separate bowl, cream oil & sugar, then add beaten egg and mix well. Add molasses & mix well. Add flour mixture in two batches & blend after each addition. Dissolve baking soda in boiled water, stirring to dissolve. Add this solution into the mixture and stir until well blended and of even consistency. Pour into baking pan & bake for 30-40 minutes.
Note: it's really important to dissolve the baking soda in the water, rather than to do the normal thing & mix the baking soda into the dry ingredients. I forgot that once and got huge weird bubbles in my cake. I don't recommend it.
Easy Penuche Frosting
(I think this was originally from a Betty Crocker cook book of my Mom's. Every year, I'd demand spice cake with penuche frosting for my birthday cake. I still like the spice cake with this, but the gingerbread is so easy and moist, it's hard to beat as the penuche substrate)
Note: for single-layer cake, please HALF the recipe.
1/2 cup butter
1 cup packed brown sugar
1/4 cup milk
1 3/4 cup sifted icing sugar
Melt butter in heavy-bottomed sauce pan. Stir in brown sugar and keep stirring as you bring to boil over medium-low heat. Stir over low heat for two more minutes. Stir in milk (NB - you're adding a cold mixture to a boiling sugar; it'll bubble up a lot and really go at it in the pot, so it's very important to keep stirring as you add the milk) and stir constantly until incorporated, and keep bubbling for about a minute more. Cool to luke warm (you can use an ice water bath to achieve this goal quicker) and stir in icing sugar in gradual batches; you may not need as much icing sugar as the recipe calls for, just enough to get to a nice, smooth, thick spreadable consistency. Spread over still-warm cake for melt-in flavour. Enjoy!


